- Posted on
- admin
- No Comments
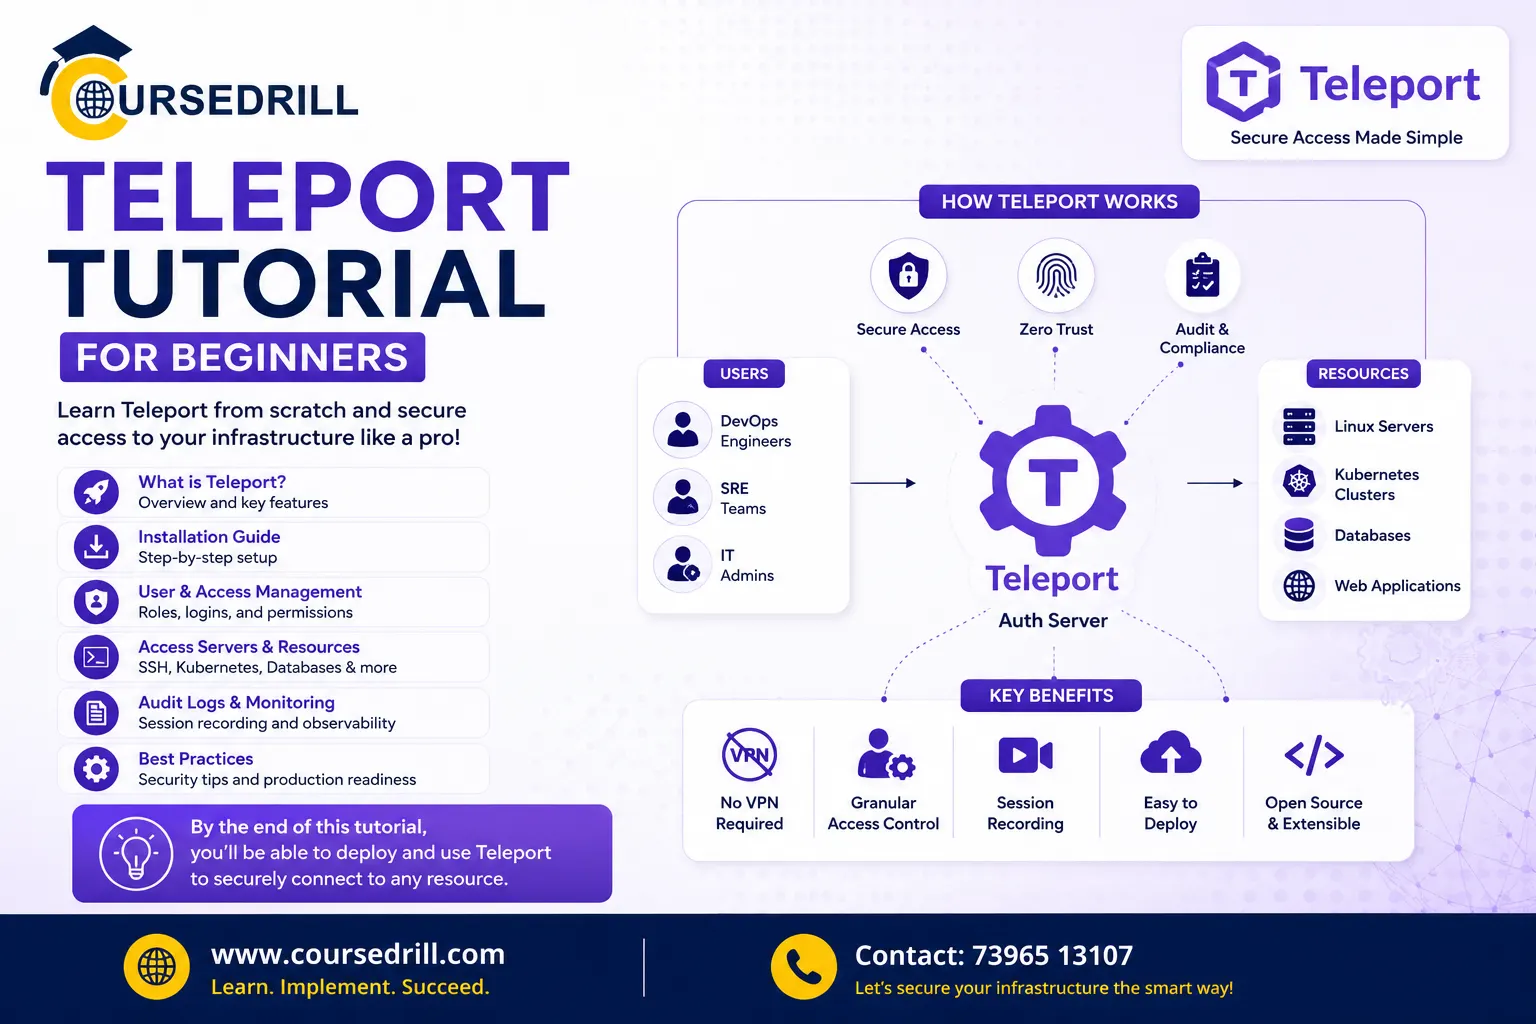
Teleport Tutorial for Beginners
Reading about what Teleport does is one thing. Actually standing up a cluster, logging in, adding your first server, and SSHing into it through a short-lived certificate is what makes the concept click. If you haven’t already, our overview of what Teleport is and how it fits into DevOps covers the architecture and terminology this tutorial assumes you’re roughly familiar with, so it’s worth a quick read first if any of the terms below feel unfamiliar.
This walkthrough gets you from zero to a working setup: installing the client tools, logging into a cluster, registering your first node, connecting to it over SSH with no password or key involved, writing your first RBAC role, and then extending that same pattern to Kubernetes clusters, databases, and internal web apps. Everything here works whether you’re using a Teleport Cloud trial or a self-hosted cluster, since the client-side commands are identical either way, only the initial cluster setup differs.
Budget an hour or two if you’re following along step by step rather than skimming. The individual commands are short, but the value of this tutorial is in actually running them against a real server, not just reading them.
Before You Start
You’ll need three things in place before any of the commands below will work:
- A running Teleport cluster. The fastest path for beginners is signing up for a free Teleport Cloud trial, which skips the auth server and proxy setup entirely, since Teleport hosts and manages that layer for you. If you’d rather self-host, Teleport’s own quickstart guide walks through standing up a single-node cluster on Linux, but that adds DNS, TLS certificates, and open ports to the list of things you need working before you get to the fun part.
- A workstation to install the client tools on. Linux, macOS, or Windows all work fine. This doesn’t need to be the same machine running the Teleport cluster itself, and in most real setups it won’t be.
- At least one server you want to bring under Teleport’s management. A throwaway cloud VM works perfectly well for learning purposes. You don’t need production infrastructure to follow this tutorial, and it’s honestly safer to practice on something disposable first.
Two command-line tools do almost everything in this tutorial. tsh is what you’ll use day to day: logging in, connecting to servers, copying files, requesting access. tctl is the administrative tool: managing users, creating roles, generating join tokens, and inspecting cluster state. If you’re the only person setting things up, you’ll end up using both, but most engineers on a team only ever touch tsh.
One more thing worth knowing upfront: everything in Teleport routes through the Proxy Service on port 443. That single port is what makes Teleport friendly to restrictive network environments, since you’re not opening a separate port for every protocol you want to proxy. Keep that in mind if you hit a connection timeout later in this guide, port 443 outbound is usually the first thing to check.
Step 1: Install the Client Tools
On Linux, downloading and extracting the release archive gets you both tsh and tctl in one go:
curl -O https://cdn.teleport.dev/teleport-v17.0.0-linux-amd64-bin.tar.gz
tar -xzf teleport-v17.0.0-linux-amd64-bin.tar.gz
sudo ./teleport/install
Check the version number against your actual cluster before running this, since Teleport ships frequent releases and copying a stale version number verbatim can leave you with client tools that are incompatible with your cluster. The version-checking command a few paragraphs down solves this for you.
On macOS, the signed .pkg installer from Teleport’s downloads page handles it, or if you’d rather stick to the terminal, Homebrew works too:
brew install teleportOn Windows, Teleport publishes a signed .exe installer that includes the same client tools you’d get on Linux or macOS. Run it, follow the prompts, and both tsh.exe and tctl.exe land on your PATH automatically.
Once installed, confirm both tools are actually reachable from your terminal:
tsh version
tctl version
If either command isn’t found, double check that the install step added the binaries to your PATH, this is the single most common snag beginners hit in the first five minutes.
One thing worth checking before you go further: your tsh and tctl versions need to be no more than one major version behind whatever version your Teleport cluster is running. If you’re not sure what version your cluster is on, you can query it directly:
curl https://teleport.example.com:443/v1/webapi/findSwap teleport.example.com for your actual cluster’s proxy address. That returns a JSON payload including server_version, which tells you exactly what to match on the client side. If your client tools are too far behind, some commands will fail with a version mismatch error rather than working in some degraded way, so it’s worth sorting this out now rather than debugging it later.
Step 2: Log In to Your Cluster
With the client tools installed, authenticate against your cluster’s proxy address:
tsh login --proxy=teleport.example.com --user=your-usernameIf your cluster is wired up to an identity provider like GitHub, Okta, or Google Workspace, you’ll get redirected to a browser window to complete SSO instead of typing a password. On a fresh cluster using local users, you’ll instead be prompted to set a password and enroll a second factor, typically a TOTP app like Google Authenticator or a hardware key like a YubiKey. Either path leads to the same result: once login succeeds, tsh stores a short-lived certificate locally, and that certificate is what authorizes everything you do from here on, not a static credential sitting in a config file somewhere.
Confirm it worked and see what’s currently registered in your cluster:
tsh status
tsh ls
tsh status shows your current identity, which cluster you’re authenticated against, and how long your certificate has left before it expires. That expiry detail matters more than it might seem at first. Unlike an SSH key that works forever until someone remembers to revoke it, a Teleport certificate quietly stops working on its own once the TTL runs out, and you’ll need to run tsh login again to get a fresh one. Some teams find this mildly annoying at first and come to appreciate it later, once they realize it means a stolen laptop or a leaked credential has a built-in expiration date.
tsh ls lists every server currently enrolled in the cluster, which on a brand-new setup will likely be empty or show just the cluster’s own auth node.
Step 3: Add Your First Server
This is where Teleport starts replacing the old SSH-key-and-bastion workflow. On the server you want to bring under management, you’ll install the Teleport agent and point it back at your auth service.
First, generate a join token from a machine that already has admin access to the cluster:
tctl tokens add --type=nodeThat command prints a one-time token and instructions for using it. Join tokens are deliberately short-lived, they’re meant to authorize a single server joining the cluster, not to sit around as a reusable secret. If you’re automating this as part of infrastructure provisioning, Teleport also supports static, pre-defined tokens configured ahead of time, but for learning purposes the dynamic one-time token is simpler and safer.
On the new server, install Teleport the same way you did on your client machine, then configure it to run just the SSH service, pointing back at your cluster:
sudo teleport configure \
  --roles=node \
  --token= \
  --auth-server=teleport.example.com:443 \
  -o file
sudo systemctl enable teleport
sudo systemctl start teleport
While you’re at it, labels are worth adding here, since they’re how you’ll target groups of servers later instead of remembering hostnames one by one. Open the generated config file and add a labels block under the SSH service:
ssh_service:
  enabled: "yes"
  labels:
    env: staging
    team: backend
    os: ubuntu
Restart the service after editing the config so the new labels take effect:
sudo systemctl restart teleportBack on your client machine, confirm the new node shows up:
tsh lsYou should see the new server listed, along with whatever labels you configured. If it’s not there, a few things are worth checking in order: whether the token has expired (they’re short-lived by design, usually good for a limited window), whether the server can actually reach your proxy address over port 443 outbound, and whether the teleport service is actually running (sudo systemctl status teleport will tell you quickly).
Step 4: SSH Into the Server, No Keys Involved
This is the payoff step. Instead of ssh user@host with a key sitting in your ~/.ssh folder, you connect through tsh:
tsh ssh ubuntu@node1Behind the scenes, tsh presents the short-lived certificate from your earlier login, Teleport checks it against your assigned roles, and if you’re authorized, you’re dropped into a shell on that server exactly the way a normal ssh command would feel. The difference is everything about that session, who connected, from where, and what they typed, is being recorded and logged by Teleport as it happens, without any extra configuration on your end.
You can also target servers by label instead of hostname, which is useful once you have more than a handful registered:
tsh ssh ubuntu@env=stagingThat works as long as the label selector matches exactly one node. If it matches several, Teleport will ask you to be more specific rather than guessing which one you meant.
File transfer works the same way scp does, just routed through Teleport’s certificate-based auth instead of a raw key:
tsh scp localfile.txt ubuntu@node1:/remote/path/Port forwarding, if you’ve ever used ssh -L to tunnel a remote service to your local machine, works the same way through tsh:
tsh ssh -L 8080:localhost:80 ubuntu@node1That forwards port 80 on the remote node to port 8080 on your local machine, all still going through the same certificate-based connection rather than a separately managed SSH tunnel.
Step 5: Write Your First RBAC Role
Access so far has probably been wide open because your admin user has broad permissions by default. Real teams don’t work that way, so it’s worth writing an actual role early on rather than treating this as an advanced topic to revisit later.
Here’s a role that only allows SSH access to servers labeled env: staging, logging in as the ubuntu user, and explicitly denies anything labeled env: production:
kind: role
version: v7
metadata:
  name: staging-access
spec:
  allow:
    logins:
      - ubuntu
    node_labels:
      env: staging
  deny:
    node_labels:
      env: production
That deny block isn’t strictly necessary here, since anything not explicitly allowed is denied by default in Teleport’s model, but it’s good practice to be explicit about production exclusions rather than relying purely on the absence of a matching allow rule. It’s the difference between “this role happens not to grant production access” and “this role is not allowed to touch production, full stop,” which reads a lot more clearly to the next person who has to audit it.
Create it and assign it to a user:
tctl create -f staging-role.yaml
tctl users update your-teammate --set-roles=staging-access
That teammate can now SSH into anything labeled env: staging as the ubuntu user, and nothing else, including production, even if they somehow guess a hostname directly. This is the actual mechanism behind least-privilege access in Teleport: roles are explicit, scoped by resource labels, and anything not allowed is denied by default rather than left open.
If someone needs more than one set of permissions, users can hold multiple roles at once, and Teleport combines them, taking the most permissive allow rules while still respecting any explicit deny. You can check what roles a user currently holds with:
tctl users lsStep 6: Review a Session Recording
Every SSH session that ran through Teleport got recorded automatically, and you don’t need to set anything up separately for that to happen, it’s part of the default behavior once a session runs through the Proxy Service.
From the Teleport Web UI, the Audit Log section lists recent sessions, and clicking into one gives you a full terminal playback, exactly what was typed, exactly when, scrubbable like a video.
From the command line, you can also list and play back recent sessions directly:
tsh sessions ls
tsh play
This is the piece that turns “we think that admin ran a risky command last week” into “here’s the exact recording of what they ran, timestamped, down to the second.” It’s also usually the single feature that makes the strongest case internally for adopting Teleport in the first place, once people actually see it working rather than reading about it in a feature list.
Teleport also supports moderated sessions, where a second person has to actively watch and can terminate a session in real time, which is worth knowing about even if you don’t set it up in this tutorial. It’s typically reserved for the highest-risk access paths, think production database consoles or anything touching customer data directly, rather than everyday SSH.
Step 7: Try Requesting Temporary Elevated Access
If you want a taste of Teleport’s just-in-time access model before diving deeper, Access Requests are worth trying next. Instead of permanently assigning someone the production-access role, they can request it for a limited window:
tsh request create --roles=production-access --reason="Investigating incident #482"An admin, or an integration like Slack or PagerDuty if you’ve wired one up, sees the request come in and can approve or deny it. Once approved, the requester gets the elevated role for a defined period, and then it expires automatically. No one has to remember to revoke it later, which is precisely the failure mode that tends to accumulate quietly in teams managing access by hand.
You can check the status of a pending request at any point:
tsh request lsAnd once a request is approved, the requester needs to actually assume the new role before it takes effect:
tsh login --request-id=That last step is easy to forget the first time. Approval alone doesn’t automatically elevate an already-active session, the user has to log back in against the approved request to pick up the new permissions.
Step 8: Extend the Same Pattern to Kubernetes
Once SSH access feels comfortable, Kubernetes access follows an almost identical pattern. On a cluster you want to register, you’d typically deploy the Teleport Kubernetes agent via Helm:
helm install teleport-agent teleport/teleport-kube-agent \
  --set roles=kube \
  --set proxyAddr=teleport.example.com:443 \
  --set kubeClusterName=my-cluster \
  --set token= \
  --create-namespace \
  --namespace teleport-agent
After that, tsh handles the rest, the same way it did for SSH:
tsh kube login my-cluster
kubectl get pods
Once logged in, your kubectl config gets automatically updated to route through Teleport, so every kubectl command you run afterward is authenticated with your short-lived certificate rather than a static kubeconfig file that could leak or get copied somewhere it shouldn’t be. RBAC roles work the same way here too, you can restrict which namespaces, resources, or verbs a role is allowed to touch, mirroring the node_labels pattern from Step 5 but scoped to Kubernetes resources instead.
Step 9: Extend the Same Pattern to Databases
Database access follows the same shape again. Registering a database with Teleport means it never has to expose its port directly to the network, connections instead route through the Proxy Service just like SSH and Kubernetes did.
A basic PostgreSQL registration looks like this in your Teleport config:
db_service:
  enabled: "yes"
  databases:
    - name: staging-postgres
      protocol: postgres
      uri: staging-db.internal:5432
      labels:
        env: staging
From your client machine, logging in and connecting works through tsh again:
tsh db login staging-postgres --db-user=app_user --db-name=app_db
tsh db connect staging-postgres
That last command drops you into a psql session, connected through Teleport’s proxy, with no raw database credentials typed anywhere and no port exposed publicly. The same session recording and RBAC model from earlier steps applies here too, database queries can be logged, and access can be scoped by label exactly the way SSH access was.
Step 10: Extend the Same Pattern to Internal Web Apps
The last common resource type is application access, useful for internal tools like Grafana, an admin dashboard, or anything else that normally sits behind a VPN with no authentication of its own. Registering an app is a short config addition:
app_service:
  enabled: "yes"
  apps:
    - name: grafana
      uri: http://localhost:3000
      labels:
        env: staging
Once registered, tsh can log you in and either open a local proxy for tools that expect direct network access, or you can just visit the app through the Teleport Web UI, where it appears alongside your SSH and database resources:
tsh apps login grafanaThe pattern by now should feel familiar: one identity, one certificate, one audit trail, extended across every resource type instead of managed separately for each one.
Common Beginner Mistakes to Avoid
A few things trip up almost everyone in their first week with Teleport, worth flagging here so you can skip past them:
- Forgetting that certificates expire. If a command that worked yesterday suddenly fails with an authentication error, run
tsh loginagain before assuming something is broken. - Reusing an expired join token. Tokens are single-use and short-lived by design. If a node fails to join, generate a fresh token rather than troubleshooting the old one.
- Writing overly broad roles early on. It’s tempting to grant wide access while you’re still learning, but it defeats the purpose. Start scoped roles from day one, even in a test environment, so the habit carries over when it actually matters.
- Mismatched client and cluster versions. If commands behave unexpectedly or fail with unclear errors, check
tsh versionagainst your cluster’s actual version before digging further. - Assuming approval alone grants access. As covered in Step 7, an approved access request still requires the user to log back in with
--request-idbefore the elevated role takes effect.
Frequently Asked Questions
Do I need a self-hosted cluster to follow this tutorial? No. A Teleport Cloud trial works identically for every command in this guide, since tsh and tctl talk to the proxy address the same way regardless of whether the cluster is self-hosted or managed.
What’s the difference between tsh and tctl? tsh is the everyday client tool for logging in and connecting to resources, the equivalent of what you’d normally reach for with ssh or scp. tctl is the administrative tool for managing users, roles, tokens, and cluster configuration, and it typically requires admin-level access.
Why did my node join token stop working? Join tokens are short-lived by design, usually valid for a limited window after creation. If a server didn’t join in time, just generate a fresh token with tctl tokens add --type=node and try again.
Can I use my regular SSH key instead of tsh? Not through Teleport’s protected path. The entire point of the setup is replacing static SSH keys with short-lived, identity-bound certificates, so connections need to go through tsh to get that certificate in the first place.
How long does a login certificate last before I need to log in again? It depends on your cluster’s configured TTL, but a common default is several hours up to about 12. Running tsh status at any point shows exactly how much time is left on your current session.
Does Teleport work the same way for Kubernetes and databases as it does for SSH? Yes, structurally. Each resource type gets registered with the cluster, targeted by labels, governed by the same RBAC role model, and accessed through tsh, with session activity logged the same way SSH sessions are.
What happens if I lose my laptop while logged in? Because access is tied to a short-lived certificate rather than a permanent key, the exposure window is limited to whatever TTL was left on that certificate when the laptop was lost, rather than indefinitely until someone manually revokes an SSH key. An admin can also lock the user or rotate the CA immediately to cut off access sooner.
Is this tutorial’s setup safe to leave running in production? This walkthrough is meant to get you comfortable with the core workflow, not to be your final production configuration. Before going further, look at proper SSO integration, a hardened RBAC policy beyond the single example role here, moderated sessions for your highest-risk resources, and Teleport’s guidance on deploying a highly available cluster.
Wrapping Up
The jump from reading about certificate-based access to actually watching a password-free SSH session get recorded in real time is where Teleport starts to make sense. Once you’re comfortable with tsh login, adding a node, and writing a role that actually restricts something, you’ve covered the core mechanics that everything else, Kubernetes access, database access, application access, workload identity, is built on top of. The pattern doesn’t change much as you add resource types, which is by design, learning it once here means you’re not relearning it from scratch for every new system you bring under Teleport’s management.
For the full picture of why this architecture exists and where it fits alongside your identity provider, our guide to what Teleport is in DevOps is worth a read if you skipped straight to this tutorial. And for the official reference on every flag and edge case covered here, Teleport’s own documentation is the best place to go deeper.
For more hands-on DevOps and infrastructure tutorials like this one, keep exploring the guides on CourseDrill.
Popular Courses